
Fix Dell “No Bootable Devices Found” (Without Losing Your Data)
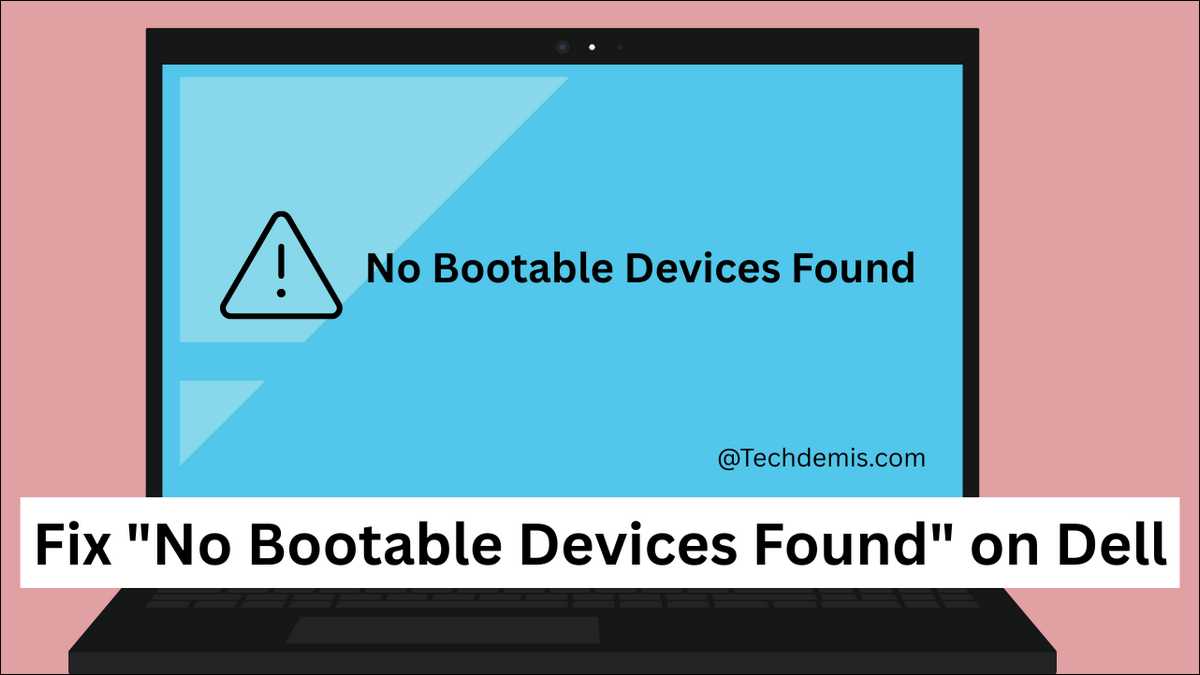
Your Dell laptop or desktop powers on, and the logo flashes. But then four cold words stop you: No bootable devices found.
It feels like the computer just died, but it hasn’t. This error is common, and it’s fixable far more often than people fear.
So here’s what’s really happening. Your Dell computer finished its hardware check fine. However, it simply can’t find the operating system to load next.
And that matters more than you’d think. A boot-order glitch and a dead drive look identical on screen. The fixes, though, are worlds apart.
That trap is BitLocker. Change the wrong BIOS setting on an encrypted Dell, and it’ll demand a recovery key. Lose that key, and you can lose everything.
So we’ll start data-safe, and try the gentle fixes first. And we’ll treat reinstalling Windows as the last resort, never the first.

Key Findings
- What it means: Your PC passed its hardware test but can’t find or load Windows.
- Most likely cause: A boot-order change, a wrong boot mode, or a loose drive, not always a dead disk.
- The biggest risk: Changing Boot Mode or SATA mode on a BitLocker drive triggers a recovery-key demand.
- Do this first: Find your BitLocker key before touching BIOS. Dell can’t retrieve it for you.
- The trap: If Windows was installed in Legacy mode on a modern Dell, a BIOS toggle won’t fix it.
- Cost: Dell’s built-in tools handle most cases. You don’t need paid software.
What “No Bootable Devices Found” Actually Means
It means your Dell laptop or desktop can’t find a drive, and so couldn’t start the Windows operating system. While, the hardware woke up fine, but the operating system is missing in action.
Picture startup as a relay race. Each runner hands off to the next. This error means a baton got dropped near the finish.
And here’s the encouraging part. The early runners finished their leg fine. Your screen, memory, and processor all work.
That’s huge information, actually. A truly dead laptop or desktop wouldn’t show this message. It’d show nothing at all.
The boot process
Every Dell computer follows the same startup steps. So let’s walk through it quickly.
- First comes power. You press the button, and electricity flows. The motherboard wakes up.
- Next is the firmware check. Your BIOS or UEFI tests the memory, keyboard, and core parts. This is called POST, the power-on self-test.
- Then the search begins. The firmware looks for a boot device, usually your SSD. It needs a place to load Windows from.
- After that, the bootloader runs. It’s a tiny program that points to the operating system. Then Windows itself loads into memory.
So where does the error strike? Right at the search step. POST passed, but the firmware found nothing bootable to hand off to.
“No Bootable Devices Found” versus similar errors
Several Dell computer errors sound the same but could mean different things. Mixing them up wastes hours. So here’s how to tell them apart fast.
| Error message | What it usually means | First place to look |
|---|---|---|
| No Bootable Devices Found | Firmware can’t locate any drive to boot from | Boot order and drive detection in BIOS |
| Boot Device Not Found | Same family: the bootable device isn’t visible | Drive connection and boot mode |
| Operating System Not Found | Drive is seen, but Windows files aren’t | Boot files (MBR/BCD) or wrong partition |
| INACCESSIBLE_BOOT_DEVICE (0x0000007B) | Windows can’t open the drive it expected | SATA mode mismatch (RAID vs AHCI) |
Didi you notice the pattern? The first two are firmware-level. The drive can’t be found at all.
But the last two are different. The drive shows up, yet something inside it is wrong. That single clue could hange your whole approach to fix errors on your laptop or desktop.
What about “Strike F1 to retry boot, F2 for setup”?
This message is the same problem. Your Dell computer can’t boot and wants instructions; so it offers you two quick doors.
- Pressing F1 retries the boot. That rarely helps on its own.
- Pressing F2 opens BIOS, where the real fixing happens.
So treat this exactly like our main error. Tap F2, then check your boot order and settings. The same fixes apply directly.
The three root causes Dell officially recognises
Dell names three core causes for a no-boot Dell. Every fix in this guide traces back to one of them. So keep these in mind throughout.
- The first is a corrupted operating system. Windows files got damaged. The bootloader can’t do its job.
- The second is a connection issue. The cable, slot, or socket between drive and motherboard went bad. The drive’s fine, but the link isn’t.
- And the third is a damaged drive. The SSD or hard disk physically failed. This one’s less common than people assume.
Why does this order matter? Because two of three causes are recoverable without a new drive. So, panic less, instead diagnose more.
Quick Diagnosis: Match Your Symptom to a Fix
You can often pinpoint the cause by what happened right before. Your recent actions are the best clue you have. So let’s use them.
Think back to the last thing you did.
Did you update something? Did you bump the laptop? That could narrow everything down.
| What happened right before | Likely cause | Where to jump |
|---|---|---|
| You left a USB stick plugged in | Wrong boot device selected | Fast Fixes, Step 1 |
| You changed a BIOS setting | Boot mode or SATA mismatch | Fast Fixes, Step 4 |
| You dropped or bumped the laptop | Loose drive connection | Hardware Path |
| A Windows update interrupted | Corrupted boot files | Software Repairs |
| Nothing, it just happened | Aging drive or random corruption | Decision Tree |
| You switched Legacy to UEFI | Legacy-installed OS | Legacy-Mode One-Way Door |
See your situation above? Then you’ve already saved yourself guesswork. Head straight to that section if you’d like.
Not sure what triggered it? No problem at all. Just work through this guide in order. The early fixes are quick and harmless.
The “what changed?” question matters most
Computers rarely break for no reason. Something usually shifted just before the error. Finding that shift is half the battle.
A boot error after a BIOS tweak points one way. The same error after a drop points elsewhere. So the trigger reshapes your whole diagnosis.
Before you start, then, ask yourself one question. What did I do last? Honest answers fix Dells faster.
Before You Change Anything: A 2-Minute Safety Checklist
Stop. Don’t open BIOS yet. Sixty seconds of prep here can save you from total data loss later.
Most guides skip this entirely. They send you straight into settings. Then a BitLocker prompt appears, and people freeze.
Find your BitLocker recovery key now
Locate your BitLocker key before you touch a single setting. This is the most important step nobody mentions. We’ll explain why in a moment.
Here’s the thing: many modern Dells encrypt the drive by default. Encryption is silent and invisible until something changes. Change a BIOS setting, and the lock snaps shut.
When that happens, Windows demands a 48-digit recovery key. No key, no boot. It’s that strict.
So where’s your key? Basically, it is tied to your Microsoft account.
Sign in to account.microsoft.com/devices/recoverykey on your phone, then find it under Devices.
Save it somewhere safe right now. Write it down. Email it to yourself. Future-you will be grateful.
⚠️ Important Note: Dell does not store or have access to your BitLocker recovery key. According to Dell’s official support documentation, if you can’t find it, you may have to reset the device, and that means losing your data. So find the key first.
Photograph your current BIOS settings
Snap a photo of your BIOS screens before you edit anything. It’s your undo button. If a change backfires, you’ll know exactly how to revert.
Use your phone. Capture the boot sequence page. Capture the SATA and boot-mode settings too.
This tip sounds basic. Still, it’s the thing people wish they’d done. Two seconds now, zero regret later.
Know your keys: F2 versus F12
Two keys control everything on a Dell. Press them right as the Dell logo appears. Tap repeatedly, don’t hold.
| Key | What it opens | Use it for |
|---|---|---|
| F2 | BIOS / UEFI Setup | Changing boot order, boot mode, SATA mode |
| F12 | One-Time Boot Menu | Diagnostics, booting from USB, SupportAssist recovery |
Mix these up, and you’ll land in the wrong place. F2 is for settings. F12 is for tools and one-off boots.
The Fast Fixes (When Your Drive Is Detected): Start Here
Start with the simplest fixes, because they solve most cases. We’ve found that loose devices and bad boot orders cause a surprising share of these errors. So try these in order.
None of these reinstall anything. None of them risk your files. They’re the gentle first knock on the door.
Step 1: Remove all external devices and restart
Unplug everything and reboot. A stray USB stick is a shockingly common culprit. Your Dell may be trying to boot from it.
Pull out USB drives, SD cards, and external disks. Disconnect printers and dongles too. Leave only the charger.
Then restart. Did the error vanish? If so, a peripheral was hijacking your boot order. Problem solved.
Why does this work so often? Your Dell tries bootable USBs first. An empty stick offers nothing to boot.
So it stops and shows the error. Remove the stick, and it finds your real drive. Simple, but easy to miss.
Step 2: Hard reset to drain residual power
Drain the leftover power to clear stuck states. This simple reset fixes more startup glitches than you’d expect. And it costs nothing to try.
Shut the Dell down fully. Hold the power button until it’s off. Then unplug the charger.
Now hold the power button for 15 to 20 seconds. This discharges residual electricity. The board resets its temporary state.
Plug back in and power on. Sometimes that’s the whole fix. A flea-power gremlin, gone.
Step 3: Check the boot order in BIOS
Make sure your Windows drive sits first in the boot list. If it’s buried, the firmware never reaches it. So reorder it to the top.
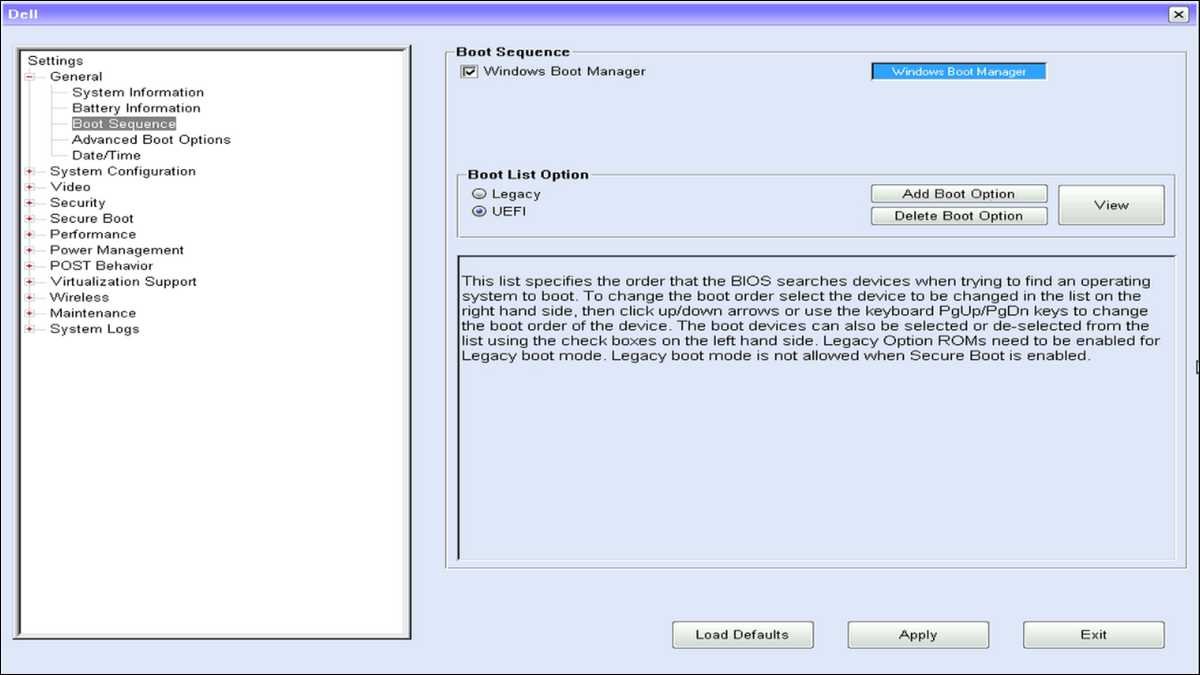
Restart and tap F2 at the Dell logo. The BIOS setup opens. Find the Boot Sequence section.
Look for your internal SSD or hard drive. Is it listed first? If not, move it up using the on-screen keys.
Those keys vary by model. Some Dells use plus and minus. Others use F5 and F6, or simple drag controls.
Either way, look for the on-screen legend. It always shows which keys reorder the list. Follow it exactly.
Then save and exit. The firmware now checks the right drive first. Reboot and watch.
Step 4: Verify Boot Mode and SATA settings
Confirm Boot Mode is UEFI and SATA Operation is AHCI. These two settings trip up countless Dells. A mismatch alone can cause this error.
Still inside BIOS, find Boot Mode. Set it to UEFI, not Legacy. Modern Dells expect UEFI.
Next, find SATA Operation. The standard setting is AHCI. We’ll cover the exception, RAID, a little later.
⚠️ Wait, read this before you change SATA mode. If your drive uses BitLocker, switching SATA mode triggers a recovery-key prompt on the next boot. Don’t change it until you’ve found your key and read the BitLocker section below. We’re flagging it twice on purpose.
Step 5: Reset BIOS to defaults
Restore default BIOS settings if you’re unsure what changed. It’s a clean slate. Often it undoes a setting you didn’t know was wrong.
Look for “Restore Settings” or “Load Defaults.” It’s usually near the bottom of the screen. Click it and confirm.
Then save and reboot. Defaults are sane and tested. If a rogue setting caused this, you just erased it.
UEFI, Legacy, and Secure Boot: Explained Simply
These three settings cause more boot confusion than anything else. Understanding them takes two minutes. After that, the fixes make total sense.
You’ll meet all three inside BIOS. They decide how your Dell starts Windows. Get them aligned, and booting just works.
What is UEFI?
UEFI is the modern firmware that starts your computer. It’s faster, safer, and smarter than the old system. Every recent Dell uses it.
It replaced the decades-old BIOS standard. It supports large drives and quick boots. It also enables security features Windows now expects.
For nearly every modern Dell, then, UEFI is the right choice. Set Boot Mode to UEFI and leave it there. That’s the default for a reason.
What is Legacy mode?
Legacy mode is the old way computers used to boot. It exists for backward compatibility. On modern hardware, though, it mostly causes trouble.
It mimics the original BIOS behaviour. Older operating systems needed it. Today’s Windows and hardware don’t.
And here’s the catch we mentioned earlier. Newer Dells can’t boot a Legacy install at all. So Legacy is best avoided on current machines.
What is Secure Boot?
Secure Boot blocks untrusted code from loading at startup. It’s a security guard for your boot process. Windows 11 actually requires it.
It checks each piece of startup software for a valid signature. Trusted code loads, unsigned code doesn’t. That stops certain malware cold.
So keep Secure Boot enabled for Windows. You’d only disable it for some Linux installs. For everyday use, leave it on.
| Setting | Best for | Recommended state |
|---|---|---|
| Boot Mode: UEFI | Modern Windows and Linux | Enabled (default) |
| Boot Mode: Legacy | Very old operating systems | Avoid on recent Dells |
| Secure Boot | Windows 10 and 11 security | Enabled |
| SATA: AHCI | Single-drive systems | Standard choice |
| SATA: RAID On | Intel RST or Optane setups | Only if originally configured |
The Decision Tree: Is Your Drive Even Detected?
This single question splits your entire repair path. Ask it before going further. The answer tells you whether you’re chasing software or hardware.
Open BIOS with F2. Find System Information or Storage. Look at the device list.
Is your drive there? That one glance changes everything. Here’s how to read it.
| What you see in BIOS | What it means | Where to go next |
|---|---|---|
| Drive is listed | Hardware’s likely fine; boot files or mode are the issue | Software Repairs section below |
| Drive is missing | A connection or hardware fault is likely | Hardware Path section below |
Why does this save time? Because a detected drive rarely needs replacing. And a missing drive rarely needs a software repair.
Most guides skip this fork. They throw every fix at you blindly. You’ll work smarter by branching here.
Here’s a visual that simplifies the process even further:
Software Repairs (Drive Detected, Windows Won’t Load)
If BIOS sees your drive, the fix is almost always software. Your files are probably intact. We just need to rebuild the path to Windows.
These repairs target corrupted boot files. They don’t touch your documents. So work through them in order.
Run Dell diagnostics first
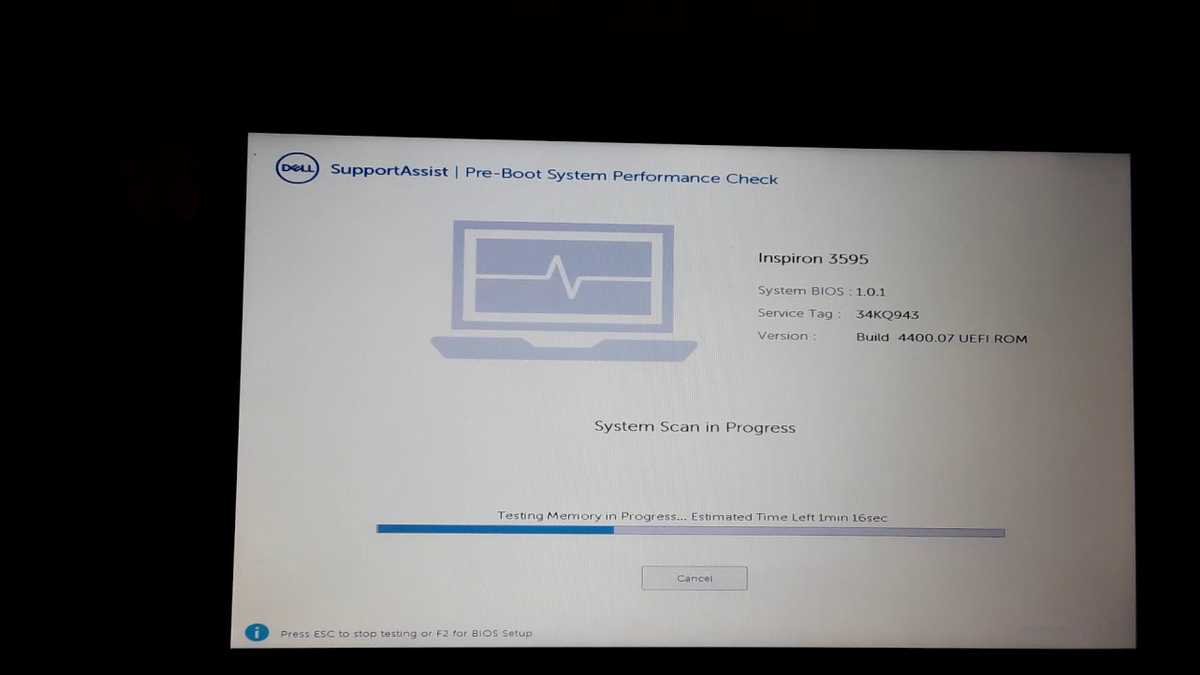
Run Dell’s built-in hardware test before anything else. It tells you whether the drive itself is healthy. And it’s free, living right in the firmware.
Restart and tap F12. Choose Diagnostics from the menu. Press Enter and let it run.
This is SupportAssist’s pre-boot assessment. It checks the drive and core parts. A pass means your hardware’s fine.
Did it fail? Write down the error code and the validation code. Then look it up at Dell’s pre-boot analysis page. That code tells you exactly what’s wrong.
Why bother noting the code? Because it pinpoints the failing part. A hard-drive code means the drive. A memory code means RAM.
So that precision saves you guesswork and money. You’ll replace only what’s broken. And support can help you faster with the code in hand.
Also read: Black Line on Monitor
Run Windows Startup Repair
Let Windows try to repair its own startup. It’s automatic and surprisingly capable. This fixes many boot-file problems on its own.
First, reach the recovery environment. Turn the Dell on, then force it off at the Windows logo. Repeat that twice.
On the third try, let it boot fully. Windows enters automatic repair. You’ll see Advanced Options.
Now navigate carefully. Choose Troubleshoot, then Advanced Options, then Startup Repair. Follow the prompts.
Heads up, BitLocker may ask for your key here. That’s normal in recovery. This is exactly why you found it earlier.
Startup Repair runs automatically once you confirm. It scans for boot problems and patches them. Give it several minutes to finish.
What if it says it couldn’t repair your PC? Don’t panic yet. That message is common and not the end. Just move on to the next repair below.
Sometimes, though, running it twice works. The first pass fixes one layer. The second clears what’s left.
Rebuild the boot files (BCD and MBR)
Rebuild the boot records when Startup Repair can’t. These tiny files tell Windows where to start. When they corrupt, booting stops cold.
The Master Boot Record tracks your system files. The Boot Configuration Data points to Windows. Either one can break.
For this, you’ll need Windows installation media on a USB. Boot from it using F12. Then open Command Prompt under repair options.
From there, technicians rebuild the BCD and repair the MBR. It’s a command-line job. If that’s unfamiliar, the recovery tool below is friendlier.
Use SupportAssist OS Recovery
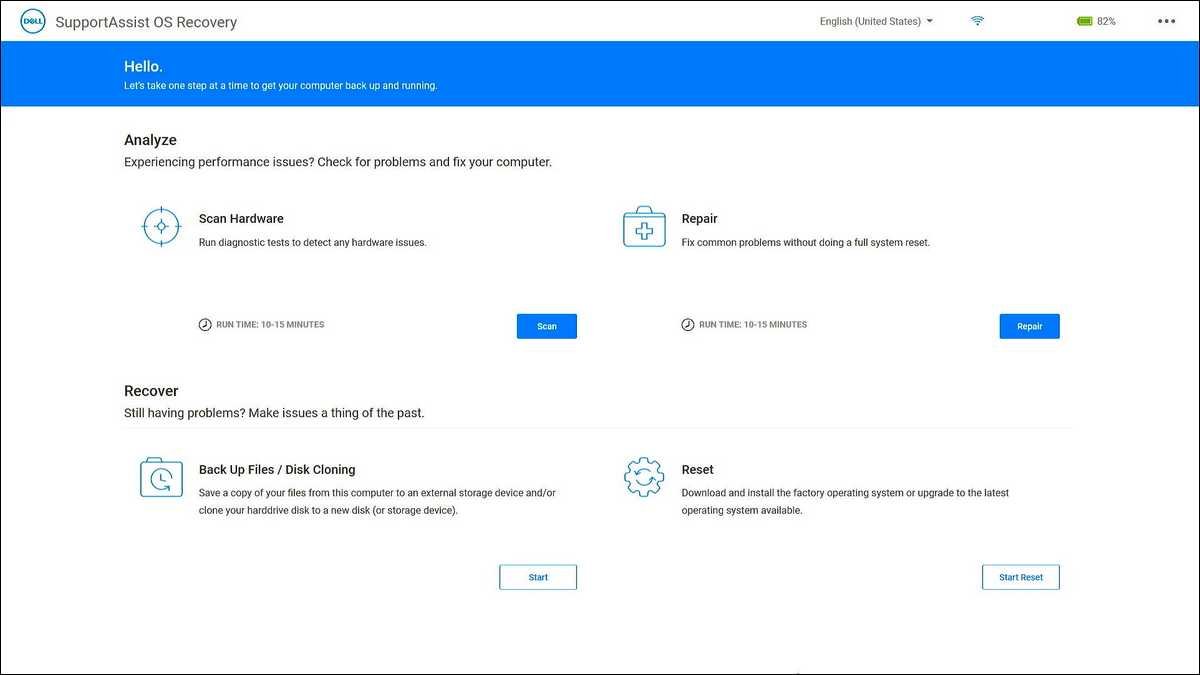
Try SupportAssist OS Recovery when the steps above stall. It’s Dell’s own repair-and-recover tool. Best of all, it’s already built in.
Restart and tap F12. Highlight SupportAssist OS Recovery. Press Enter to launch it.
Pick the Repair Software option. It runs a two-step scan. It hunts for missing or corrupted files and fixes them.
This tool is free and Dell-made. Competitors rarely mention it, because they’re selling alternatives. You already own a great one.
Activate the primary partition
Set your Windows partition back to “active” if it lost that flag. An inactive boot partition stalls startup completely. Reactivating it can restore booting in minutes.
This happens after botched updates or partition edits. Windows simply forgets which partition to start from. The fix tells it again.
So boot from your Windows USB and open Command Prompt. Use the diskpart utility to list disks and volumes. Find the partition that holds Windows.
Mark that partition active, then exit and reboot. It’s a precise, careful job. If diskpart feels intimidating, lean on the recovery tools instead.
How to create a Windows bootable USB
You’ll need a Windows installer on USB for several repairs. It’s quick to make on any working PC. Think of it as your rescue kit.
Grab a spare USB drive of 8GB or more. Use Microsoft’s official Media Creation Tool on a second computer. It builds the installer for you.
Then plug it into your broken Dell. Tap F12 at the logo. Choose the USB drive from the boot menu.
From there you reach repair options or a reinstall. The same stick rescues files too. So keep it handy for next time.
💡 UEFI tip: Build the USB for UEFI mode on modern Dells. The Media Creation Tool handles this automatically. If you use Rufus, pick the GPT partition scheme for UEFI, not MBR.
The BitLocker Trap Everyone Else Skips
Changing BIOS settings on an encrypted Dell can lock you out hard. This is the single most overlooked risk online. So we’re devoting a whole section to it.
Why? Because every other guide tells you to flip SATA mode or boot mode. Almost none warn you what happens next on an encrypted machine.
Why the “easy fix” can lock you out
BitLocker watches your hardware for changes. Flip a BIOS setting, and it sees tampering. Then it demands the recovery key to continue.
Here’s the nasty version. You switch SATA from RAID to AHCI to fix booting. The key prompt appears, you enter it.
Then Windows still won’t boot. Why? Because the drive now expects the RAID driver it no longer has.
So you’re stuck in a loop. Each reboot demands the key again. This is a documented Dell scenario, not bad luck.
Why does the driver matter so much? Because Windows loads a storage driver at startup. RAID and AHCI need different ones.
Switch the mode, and Windows reaches for the wrong driver. It can’t read its own boot files. So it stalls or loops.
The safe way to change SATA mode
Suspend BitLocker first, then change SATA mode through Safe Mode. This sequence avoids the lockout entirely. It’s the method we’d use ourselves.
If you can still reach Windows, do this before any BIOS change. Open Command Prompt as administrator. Suspend protection with the manage-bde command.
That bypasses the key prompt for one boot cycle. Then you change SATA mode safely. The drive loads the right driver without locking you out.
There’s also a Safe Boot route. Set Windows to boot into Safe Mode using msconfig. Change SATA mode in BIOS. Then return to msconfig for a normal boot.
In Safe Mode, Windows loads the correct storage driver automatically. After one clean reboot, normal startup works again. No loop, no panic.
| Approach | When to use it | Why it works |
|---|---|---|
| Suspend BitLocker first | You can still log into Windows | Skips the recovery-key prompt for one boot |
| msconfig Safe Boot | Switching SATA mode safely | Loads the right driver before normal boot |
| Reinstall Intel RST driver | You’re already stuck in a key loop | Restores the RAID driver the drive expects |
If you’re already stuck in a recovery-key loop
If every reboot begs for the key, the driver’s the problem. The fix is to restore the storage driver the drive expects. Then the loop ends.
So enter your key one more time to get into Windows. Once inside, reinstall the latest Intel Rapid Storage Technology driver. That re-teaches Windows how to talk to the drive.
Or, alternatively, set SATA back to its original mode. If it was RAID On, return it to RAID On. The loop usually breaks immediately.
⚠️ The golden rule: Never change UEFI/Legacy, Secure Boot, SATA mode, or boot order on a BitLocker drive without your recovery key in hand. BitLocker treats all of these as tampering. So have the key ready, every time.
Hardware Path (When the Drive Isn’t Detected)
If BIOS can’t see your drive, you’re dealing with hardware. Either the connection failed or the drive did. So let’s figure out which.
Don’t assume the worst yet. A loose cable mimics a dead drive perfectly. We’ll rule that out first.
Reseat the SSD or hard drive safely
Reseat the drive to fix loose connections. Vibration and drops can wiggle a drive loose. Reseating reconnects it firmly.
Power off and unplug everything. Ground yourself first by touching bare metal. Static can kill components instantly.
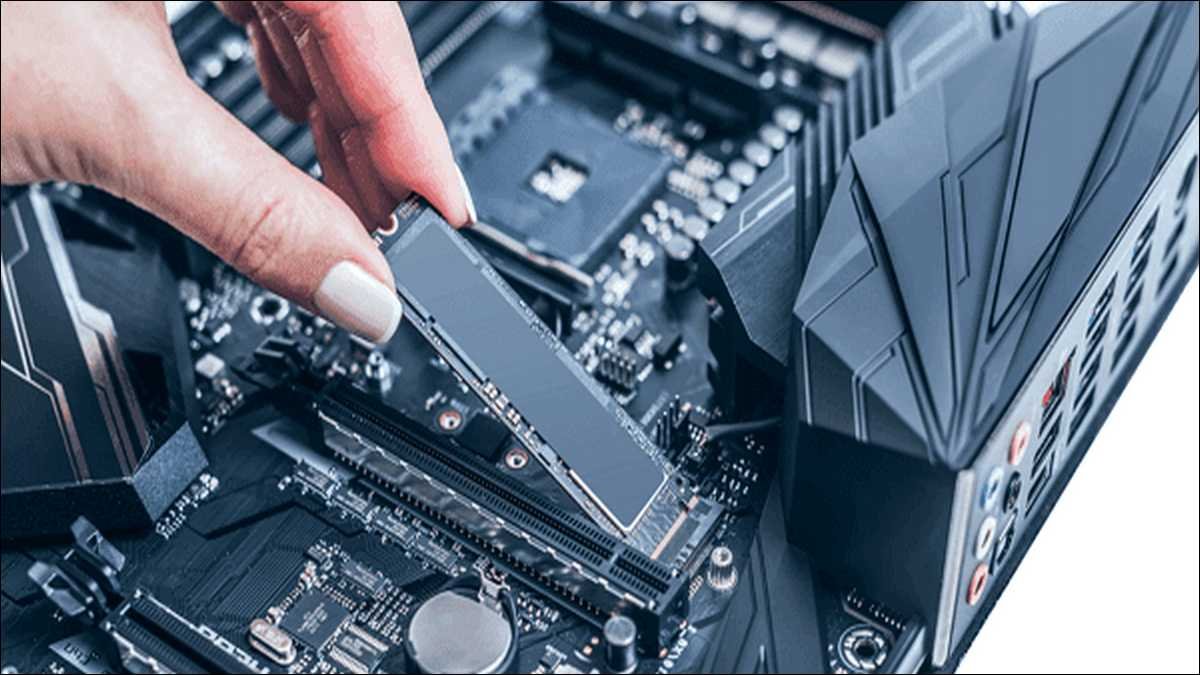
Open the back panel. Find the SSD or hard drive. Gently remove it, then press it back in firmly.
Work on a hard surface, not a bed. Check your model’s layout online first. Then reboot and check BIOS again.
How do you know it worked? The drive reappears in BIOS. That’s your green light. The connection was the whole problem.
Still missing after reseating? Then the slot or drive may be faulty. So move on to testing it elsewhere.
Test the drive in another PC
Test the drive elsewhere to confirm whether it’s alive. This single test separates a dead drive from a dead slot. It’s the definitive check.
Remove the drive from your Dell. Connect it to another computer. Use a USB-to-SATA adapter or an external enclosure.
Does the other PC see it? Then your drive’s fine. The problem lives in your Dell’s slot or motherboard.
Does it stay invisible everywhere? Then the drive likely failed. At least now you know for certain.
Check power and data cables (desktops)
On a desktop, inspect both cables running to the drive. A loose SATA or power cable mimics a dead drive. Reseating them is a two-minute fix.
Power down and open the case. Find the drive’s two cables. One carries data, the other power.
Unplug both, then firmly reconnect them. Check the motherboard end too. And swap the SATA cable if you’ve got a spare.
Cables fail more often than drives do. They’re cheap and easy to rule out. So always check them before assuming the worst.
Don’t overlook a failed BIOS battery
A dead CMOS battery can scramble your boot settings. It resets BIOS every time you power off. That can wipe your boot order silently.
The clue is a clock that keeps resetting. Your date and time go wrong after each shutdown. That’s the coin-cell battery dying.
Replacing it is cheap and simple on desktops. On laptops, it’s trickier but still doable. Fresh battery, stable settings.
A note for Windows 11 users
Windows 11 is stricter about boot settings than Windows 10. It demands UEFI, Secure Boot, and TPM. A mismatch here triggers boot errors fast.
So if you’re on Windows 11, keep UEFI on. Keep Secure Boot enabled too. Disabling either can stop Windows 11 from starting.
Also confirm TPM is enabled in BIOS. Dell labels it TPM or PTT. Windows 11 leans on it for both security and BitLocker.
How long do drives actually last?
Drives fail at a low but real rate, so age matters. Knowing the odds helps you judge whether yours is genuinely dead. So let’s look at honest numbers.
The cloud-storage company Backblaze tracks hundreds of thousands of drives. Their 2024 drive report put the average annualized failure rate around 1.35%. That’s reassuringly low.
But failures cluster with age. One analysis cited by Backblaze found failed drives died at about 1,051 days on average. That’s roughly two years and ten months.
So what does that mean for you? A four-year-old drive throwing this error is a real suspect. A six-month-old one probably isn’t dead.
One caveat, though: those are data-centre drives, not laptop SSDs. The takeaway isn’t a precise number. It’s that drives fail predictably, and age is a clue.
| Drive context | Figure | What it tells you |
|---|---|---|
| Average annual failure rate | ~1.35% (Backblaze, 2024) | Outright failure is uncommon year to year |
| Average age at failure | ~2 years, 10 months | Older drives are far likelier suspects |
Also read: How to Fix Green Screen on Laptop – 18 Fixes
The Legacy-Mode One-Way Door
If Windows was installed in Legacy mode on a modern Dell, a BIOS toggle won’t save it. This is a hard limit, not a bug. You’ll likely need to reinstall.
And this catches people constantly. Guides say “just switch to UEFI.” On a Legacy install, that advice can’t work.
How to tell if your OS was installed in Legacy
Check whether the error started right after you changed boot mode. That timing is the giveaway. A Legacy install reveals itself fast.
If you flipped Legacy to UEFI and the error appeared, that’s the clue. Windows was built for the old mode. It can’t start in the new one.
Switching back to UEFI feels like the obvious undo. But here it doesn’t help. The installation itself is tied to Legacy.
Why a UEFI toggle won’t fix it on modern Dells
Newer Dell processors are built to boot only in UEFI. So a Legacy-installed OS simply won’t start. Reinstalling in UEFI is the path forward.
According to Dell’s knowledge base, machines with 7th-generation processors and newer are designed for UEFI exclusively. Pick Legacy on those, and the OS fails to boot.
There’s a subtle exception worth knowing. If Windows was originally installed in UEFI, switching back recovers it. The trouble only sticks when the install itself was Legacy.
Reinstalling cleanly in UEFI mode
Set the BIOS to UEFI correctly before you reinstall. Get these settings right, and the new install boots perfectly. Rushing this just repeats the problem.
So enter BIOS with F2. Change Boot Sequence from Legacy to UEFI. Apply it.
Disable Legacy Option ROMs next. For Windows, enable Secure Boot. For Linux, you’d disable Secure Boot and set SATA to AHCI.
Then exit and reinstall the operating system. The fresh install matches the firmware. This time it’ll boot for good.
Recover Your Data Before Reinstalling
Pull your files off the drive before any reinstall wipes them. A reinstall can erase everything. Five minutes of backup prevents lifelong regret.
Even a “broken” Dell often has a perfectly readable drive. The boot path failed, not the data. So rescue it first.
Pulling files off a suspect drive
Connect the drive to another computer to copy your files. An enclosure makes this simple. Your photos and documents are usually right there.
Remove the drive from your Dell. Slot it into a USB enclosure. Plug it into a working PC.
If it mounts, copy what matters immediately. Documents, photos, projects- grab them all. Move them to safe storage.
Can’t see the drive at all? Try Dell’s bootable recovery USB to read it. If even that fails, professional recovery is the next call.
Dell Model Notes: Inspiron, Latitude, XPS, OptiPlex, G-Series
The fixes are the same across Dell lines, but menus differ slightly. Knowing the small variations saves frustration. So here’s the quick orientation.
The keys stay constant everywhere. F2 opens setup. F12 opens the boot menu. That’s true for Inspiron, Latitude, XPS, OptiPlex, and G-Series alike.
Menu labels vary a little, though. Some models nest the boot sequence under General settings. Others place it under Boot Configuration.
SATA Operation is Dell’s name for the storage mode. You’ll find it on nearly every model. The AHCI and RAID options live there.
Business lines like Latitude and OptiPlex lean heavily on UEFI and Secure Boot. Consumer Inspiron and G-Series behave the same way on recent hardware. When in doubt, check your model’s manual.
| Dell line | Typical user | Setup quirk to expect |
|---|---|---|
| Inspiron / G-Series | Home and gaming | UEFI-only on newer models; AHCI standard |
| Latitude | Business laptops | BitLocker often on by default; Secure Boot enabled |
| XPS | Premium / creators | Frequently RAID On; watch the SATA-mode trap |
| OptiPlex | Office desktops | Boot sequence may sit under Boot Configuration |
Also read: Enable Ultimate Performance Power Plan in Windows 10 and 11
When to Stop and Contact Dell Support
Stop self-repair when diagnostics fail with a hardware error code. That’s your signal the issue is physical. Pushing further risks making things worse.
Some moments clearly call for the pros. Recognizing them saves time and your data. So here’s when to hand it off.
Did the pre-boot diagnostics fail? Note the validation code and call Dell. A failed hardware test means a part needs attention.
Is the drive invisible even in another PC? That points to a dead drive. Recovery specialists can sometimes still rescue the data.
Are you still in warranty? Then let Dell handle the repair. There’s no reason to risk opening it yourself.
And if BIOS changes left you locked out without a key? Pause. Contact support before doing anything drastic.
Frequently Asked Questions
Will I lose my data fixing this error?
Usually not. Most fixes here, like boot order, hard reset, and startup repair, don’t touch your files. You only risk data if you reinstall Windows or wipe the drive. So back up first, and treat reinstalling as the last resort.
Is my hard drive dead?
Probably not. Run Dell’s diagnostics with F12 to check. If the drive shows up in BIOS or in another PC, it’s alive. A dead drive is invisible everywhere and fails the hardware test.
What’s the BIOS key for my Dell?
Tap F2 for BIOS setup and F12 for the boot menu. Press them repeatedly the moment the Dell logo appears. This works across Inspiron, Latitude, XPS, OptiPlex, and G-Series models.
Should I choose UEFI or Legacy boot mode?
Choose UEFI on any modern Dell. Machines with 7th-generation processors and newer are built for UEFI only. Legacy mode will simply fail to boot on these systems.
Why did my Dell suddenly ask for a BitLocker key?
Because you changed a BIOS setting. BitLocker watches for hardware changes like boot mode or SATA mode. When it detects one, it demands the recovery key as a security measure. Enter it, then re-check your settings.
Can Dell give me my BitLocker recovery key?
No. Dell doesn’t store or have access to BitLocker keys. Find yours by signing in at account.microsoft.com/devices/recoverykey under the Devices section. Without it, you may have to reset the device and lose data.
I changed SATA mode and now Windows won’t boot. What now?
Set SATA mode back to its original setting in BIOS. If you switched RAID to AHCI, return it to RAID On. Then boot into Windows and reinstall the Intel Rapid Storage Technology driver before trying again, this time through Safe Mode.
What does INACCESSIBLE_BOOT_DEVICE mean?
It means Windows can’t open the drive it expected, usually a SATA-mode mismatch. The fix is to toggle SATA Operation to the opposite setting: RAID On to AHCI, or the reverse. If that fails, restore BIOS defaults.
Can a USB drive cause this error?
Yes, and it’s one of the most common causes. If a bootable USB stick is plugged in, your Dell may try to boot from it first and find nothing. Unplug all USB devices and restart before trying anything else.
How do I get into BIOS if the error appears too fast?
Start tapping F2 immediately and repeatedly, the instant you press power. Don’t wait for the logo. Rapid taps catch the brief window before the error loads. F12 works the same way for the boot menu.
Is it cheaper to repair or replace the drive myself?
If diagnostics confirm a failed drive, a replacement SSD is usually affordable and easy to install. But if your laptop is in warranty, let Dell handle it for free. Never risk a self-repair that could void coverage.
Common Mistakes That Make It Worse
A few well-meaning moves can turn a small problem into a disaster. Avoiding them is as valuable as any fix. So here’s what to sidestep.
We’ve watched these mistakes cost people their data. None of them are obvious traps. That’s exactly why they catch so many.
Mistake 1: Changing BIOS settings without the BitLocker key
This is the big one we keep flagging. A single setting change can lock an encrypted drive. Without the key, your files become unreachable.
The fix is simple, though. Find your recovery key first. Then change settings freely.
Mistake 2: Reinstalling Windows before backing up
Reinstalling feels like a clean fix, but it wipes everything. Your drive was often readable the whole time. So back up first, reinstall second.
Pull the files off with an enclosure. Only then consider a fresh install. Order matters enormously here.
Mistake 3: Randomly toggling SATA mode
Flipping RAID and AHCI blindly can break a working Windows. The drive expects a specific driver. Switch carelessly, and it won’t boot.
So if you must change it, use the Safe Mode method. Suspend BitLocker first. Never flip it on a whim.
Mistake 4: Forcing the drive back in too hard
Reseating helps, but rough handling damages connectors. Gentle and firm beats hard and fast. Bent pins create new problems.
Ground yourself before touching parts. Press the drive in steadily. And stop if it resists.
How to Prevent This From Happening Again
A little upkeep stops most boot errors before they start. Prevention beats repair every time. These habits keep your Dell booting reliably.
None of this takes much effort. Set it up once, then forget it. Your future self stays out of recovery mode.
Keep your BIOS and drivers updated
Outdated firmware causes boot bugs that updates already fixed. Dell’s SupportAssist app handles this automatically. It scans, downloads, and installs for you.
So open SupportAssist from the Start menu. Choose “Update software” and start the scan. It catches BIOS and driver updates together.
Run it every month or so. Fresh firmware means fewer surprises. It’s the easiest prevention there is.
Back up your files regularly
Regular backups make any boot error a minor annoyance. If the drive dies, your data doesn’t. That’s the whole point of backups.
Use the cloud, an external drive, or both. Automate it so you don’t forget. Set it and trust it.
Then a “No bootable devices found” screen loses its sting. You’ll fix the boot issue calmly. Your files are already safe.
Save your BitLocker key somewhere safe
Store your recovery key before you ever need it. The worst time to hunt for it is mid-crisis. So stash it now, in two places.
Keep one copy in your Microsoft account. Keep another offline, like a printout. Redundancy here pays off hugely.
Watch your drive’s health
Monitor drive health so failures don’t ambush you. SMART data warns you before a drive dies. Free tools read it easily.
Watch for reallocated sectors and rising error counts. Those are early warning signs. Replace an aging drive before it fails completely.
And remember the data we saw earlier. Drives tend to fail around the three-year mark, per Backblaze’s analysis. So plan replacements with that in mind.
Final Thoughts
That cold error message rarely means what people fear. A “No bootable devices found” Dell is usually recoverable. The data is often perfectly safe.
So work from gentle to drastic. Remove devices, reset, check the boot order. Most cases end right there.
Then lean on Dell’s free tools next. Diagnostics and SupportAssist OS Recovery solve a lot. You rarely need to buy anything.
And remember the one move that turns a fixable problem into lost data. It’s changing BIOS settings on an encrypted drive without the key. So find that key first, always.
Stay methodical, and you’ll likely fix this yourself. When the diagnostics point to dead hardware, that’s your cue. Hand it to Dell with your error code ready.

![How to Recover Deleted Files from the Recycle Bin on Windows 11? [Free Methods]](https://www.techdemis.com/wp-content/uploads/2026/06/How-to-Recover-Deleted-Files-from-the-Recycle-Bin-on-Windows-11-800x450.webp)

![Restart Bluetooth Service In Windows 11 & 10 [Full Guide]](https://www.techdemis.com/wp-content/uploads/2026/06/Restart-Bluetooth-Service-In-Windows-11-and-10-800x450.webp)

